 Now winter is finally gone it is time to dust off the old carbon arrows for outdoor and throw the big alloys in the closet. Hoyt Pro Staff shooter and regular contributor Sander Dolderman takes you through his basic setup fort he outdoor season.
1.NOCKING POINT
Outdoor en indoor arrows often have a different nock and shaft diameter so I always start by checking the nock fit on the center serving. A perfect fit would be when you have a snug fit on the serving with little resistance moving it up and down. I it fits to tight you will not get a clean release of the string which will give tuning problems and excessive nock wear or breakage.
2.LAUNCHER
Second step is changing the blade launcher which comes in different sizes and stiffness. Depending on your arrow size and weight you choose the one that gives you the best clearance.
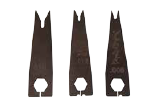
Except fort he stiffness you can choose between a wide (mostly indoor arrows), medium (mostly used for outdoor arrows)
or extra small (outdoor arrows with small diameters). For outdoor I use the Arizona Freak 0.10 launcher which is a supper small and gives me the best clearance.
3.NOCKING POINT
Indoor and outdoor arrows require different settings for your blade launcher or nocking point. A good starting point is to place your nock at 0 (zero), which is square on your launcher. Make sure your launcher is in a neutral position so you have enough room to move up and down to fine tune.
4.PEEPSIGHT
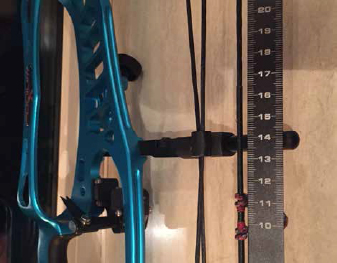 With the adjustment of your nocking point your peep-sight will require some adjustment as well. It can be quite the challenge to find the right height especially when shooting different distances. At some distances your peep-sight and anchoring will feel more comfortable then others.
I adjust my peep-sight according to what discipline I will shoot. For 3D and field I tune it so at 30 mtr it will give me the best anchor and view. This because in field and 3D you shoot a lot of shorter distances and a higher peep sight will feel more comfortable. For FITA 1440 and 50 mtr rounds I tune my peep-sight at 60 mtr. Although it will seem a little low at 30 mtr, it will give you more advantage at the longer distances (50-70 and 90 mtr).
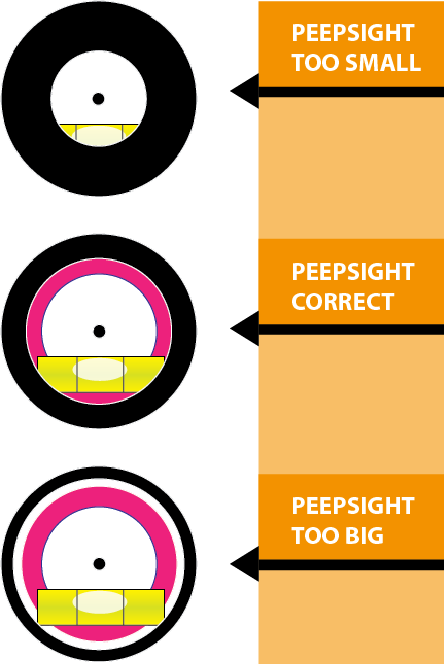
| 5.PEEP-SIGHT SIZE When I go from indoor to outdoor I also need to adjust the size of my peep-sight because of the different light conditions.It is very important that your peep is big enough to be able to align it with your scope.There are many peep-sight sets with different standard sizes but I always use a small wood drill to adjust the hole to the correct size I need. |
 |
6.PAPER TEST
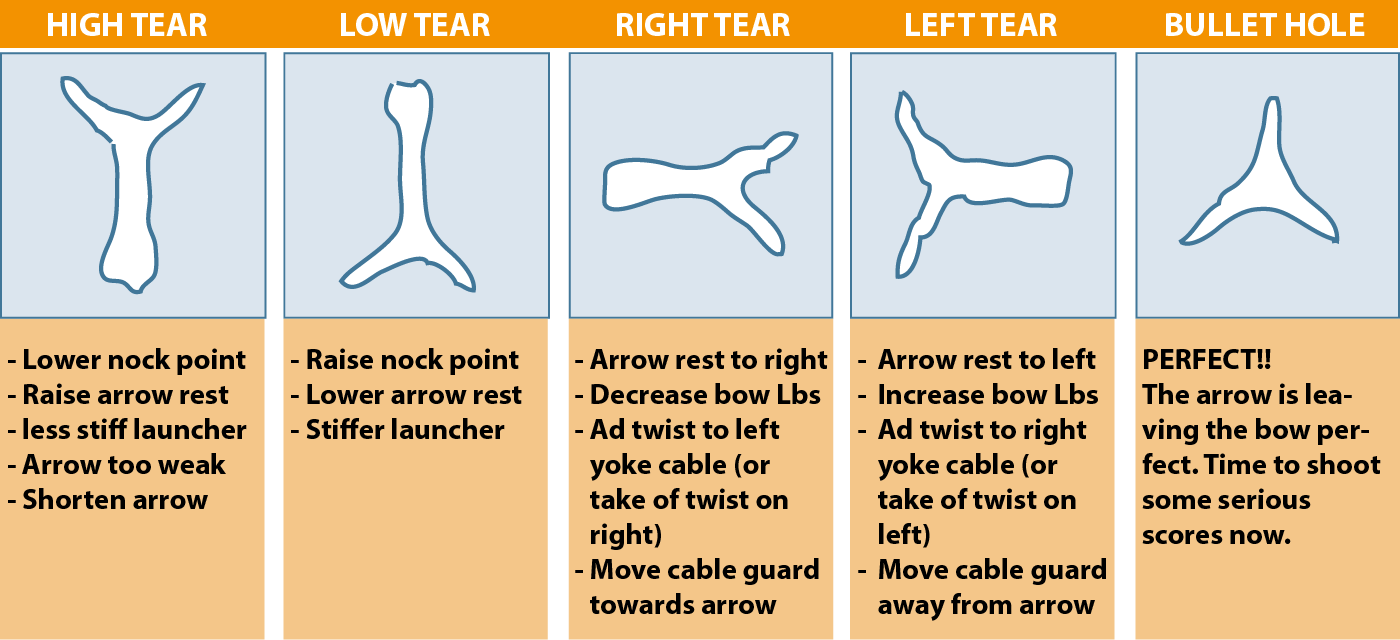 Now you have your basic setup it is time to do some shooting tests. I always start with the paper test to check how the arrow leaves the bow. Many clubs have a paper test setup but if not, a large piece of paper (the back of a target face) will do as long as you can hang it up so it’s nice and tight.
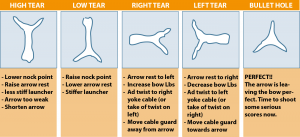
With your stabilizer about 5 inches away from the paper shoot a few arrows through the paper. When you’re done it is time to analyze the tears. In principal there are five (5) possibilities.
If you have a combination of two (2) of the above possibilities first work on the High or Low tear. Getting rid of either one of them might also change your Left or Right tear.
When doing the paper test try to make sure you don’t torque the bow as this will give you a false reading fort he tears. Assuming it is straight , use your front stabilizer to check you don’t torque the bow left or right.
When you’ve gone through these steps you have got your basic setup. Be aware that in most cases you would still need to fine tune your bow. You can do this at your range with your coach or by your self. Some other useful tuning tips will be posted in this section of the website soon.
If you still have any questions concerning these tips or other tuning questions don’t hesitate to ask. Also if there are some subjects you would like to see discussed here. You can find me on Twitter or Facebook, @sanderdolderman.
